How to optimize routes and adjust them by hand
13 steps6 min readUpdated
DayRoute plans every driver’s route for the day in one click, keeping time windows, vehicle capacity, driver skills and shifts, and says in plain words why any stop did not fit. Then you make the changes only you know about.
In this guide
- 1.Check the planning setup
- 2.Give stops to a driver first
- 3.Plan the routes
- 4.Read the stops by route
- 5.Check a stop at a glance
- 6.Understand stops that didn’t fit
- 7.Drag and drop
- 8.Optimize one route
- 9.Reverse a route or change its color
- 10.Draw the route you want
- 11.Lock and re-plan the rest
- 12.See what a re-plan changed
- 13.Add late orders
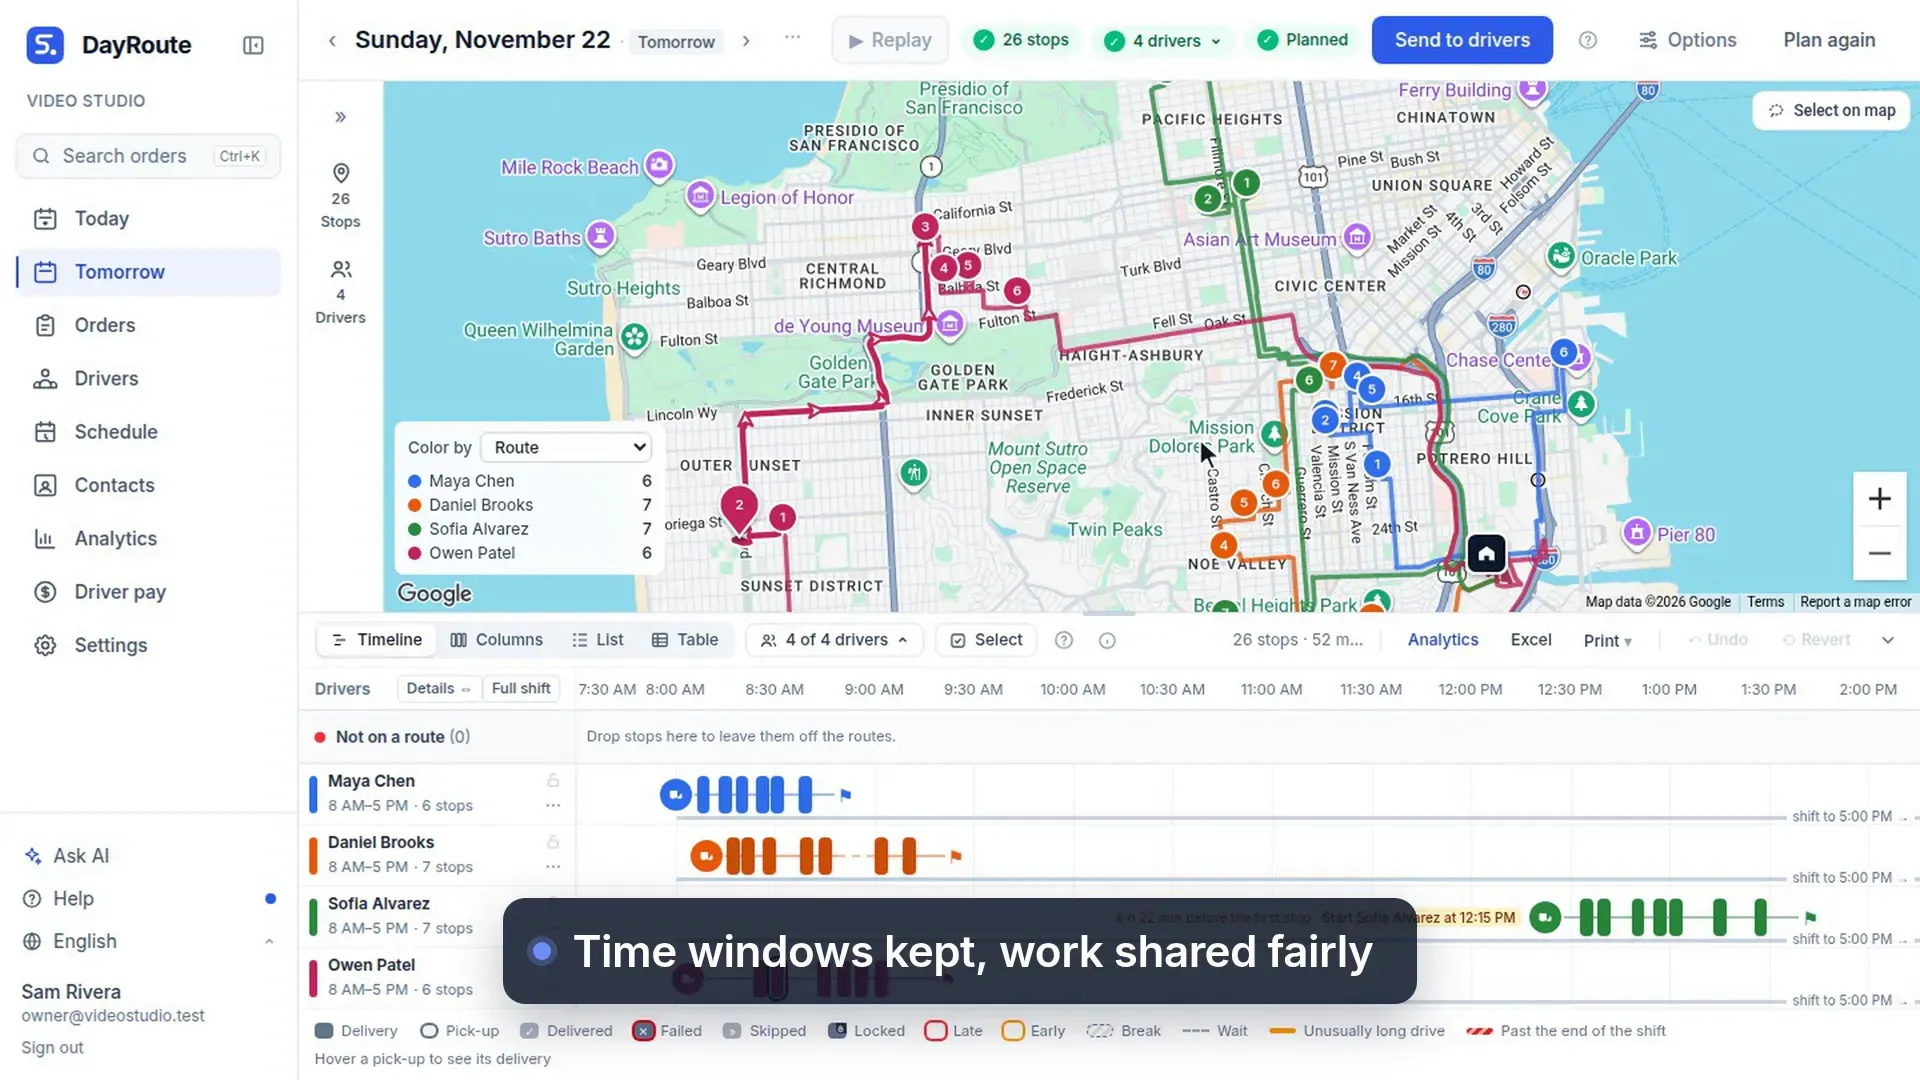
What this video shows
One click plans every route for tomorrow at once, keeping time windows, then each driver gets a private link.
- Let's plan tomorrow, start to finish.
- Tomorrow's orders are already on the map.
- One click on Plan routes, and every route is planned together, for every driver at once.
- Time windows are kept, and the work is shared fairly across the team.
- Then send each driver a private link. It opens in the phone's browser, no install needed.
- Plan again later, and the same links update.
Step 1: Check the planning setup
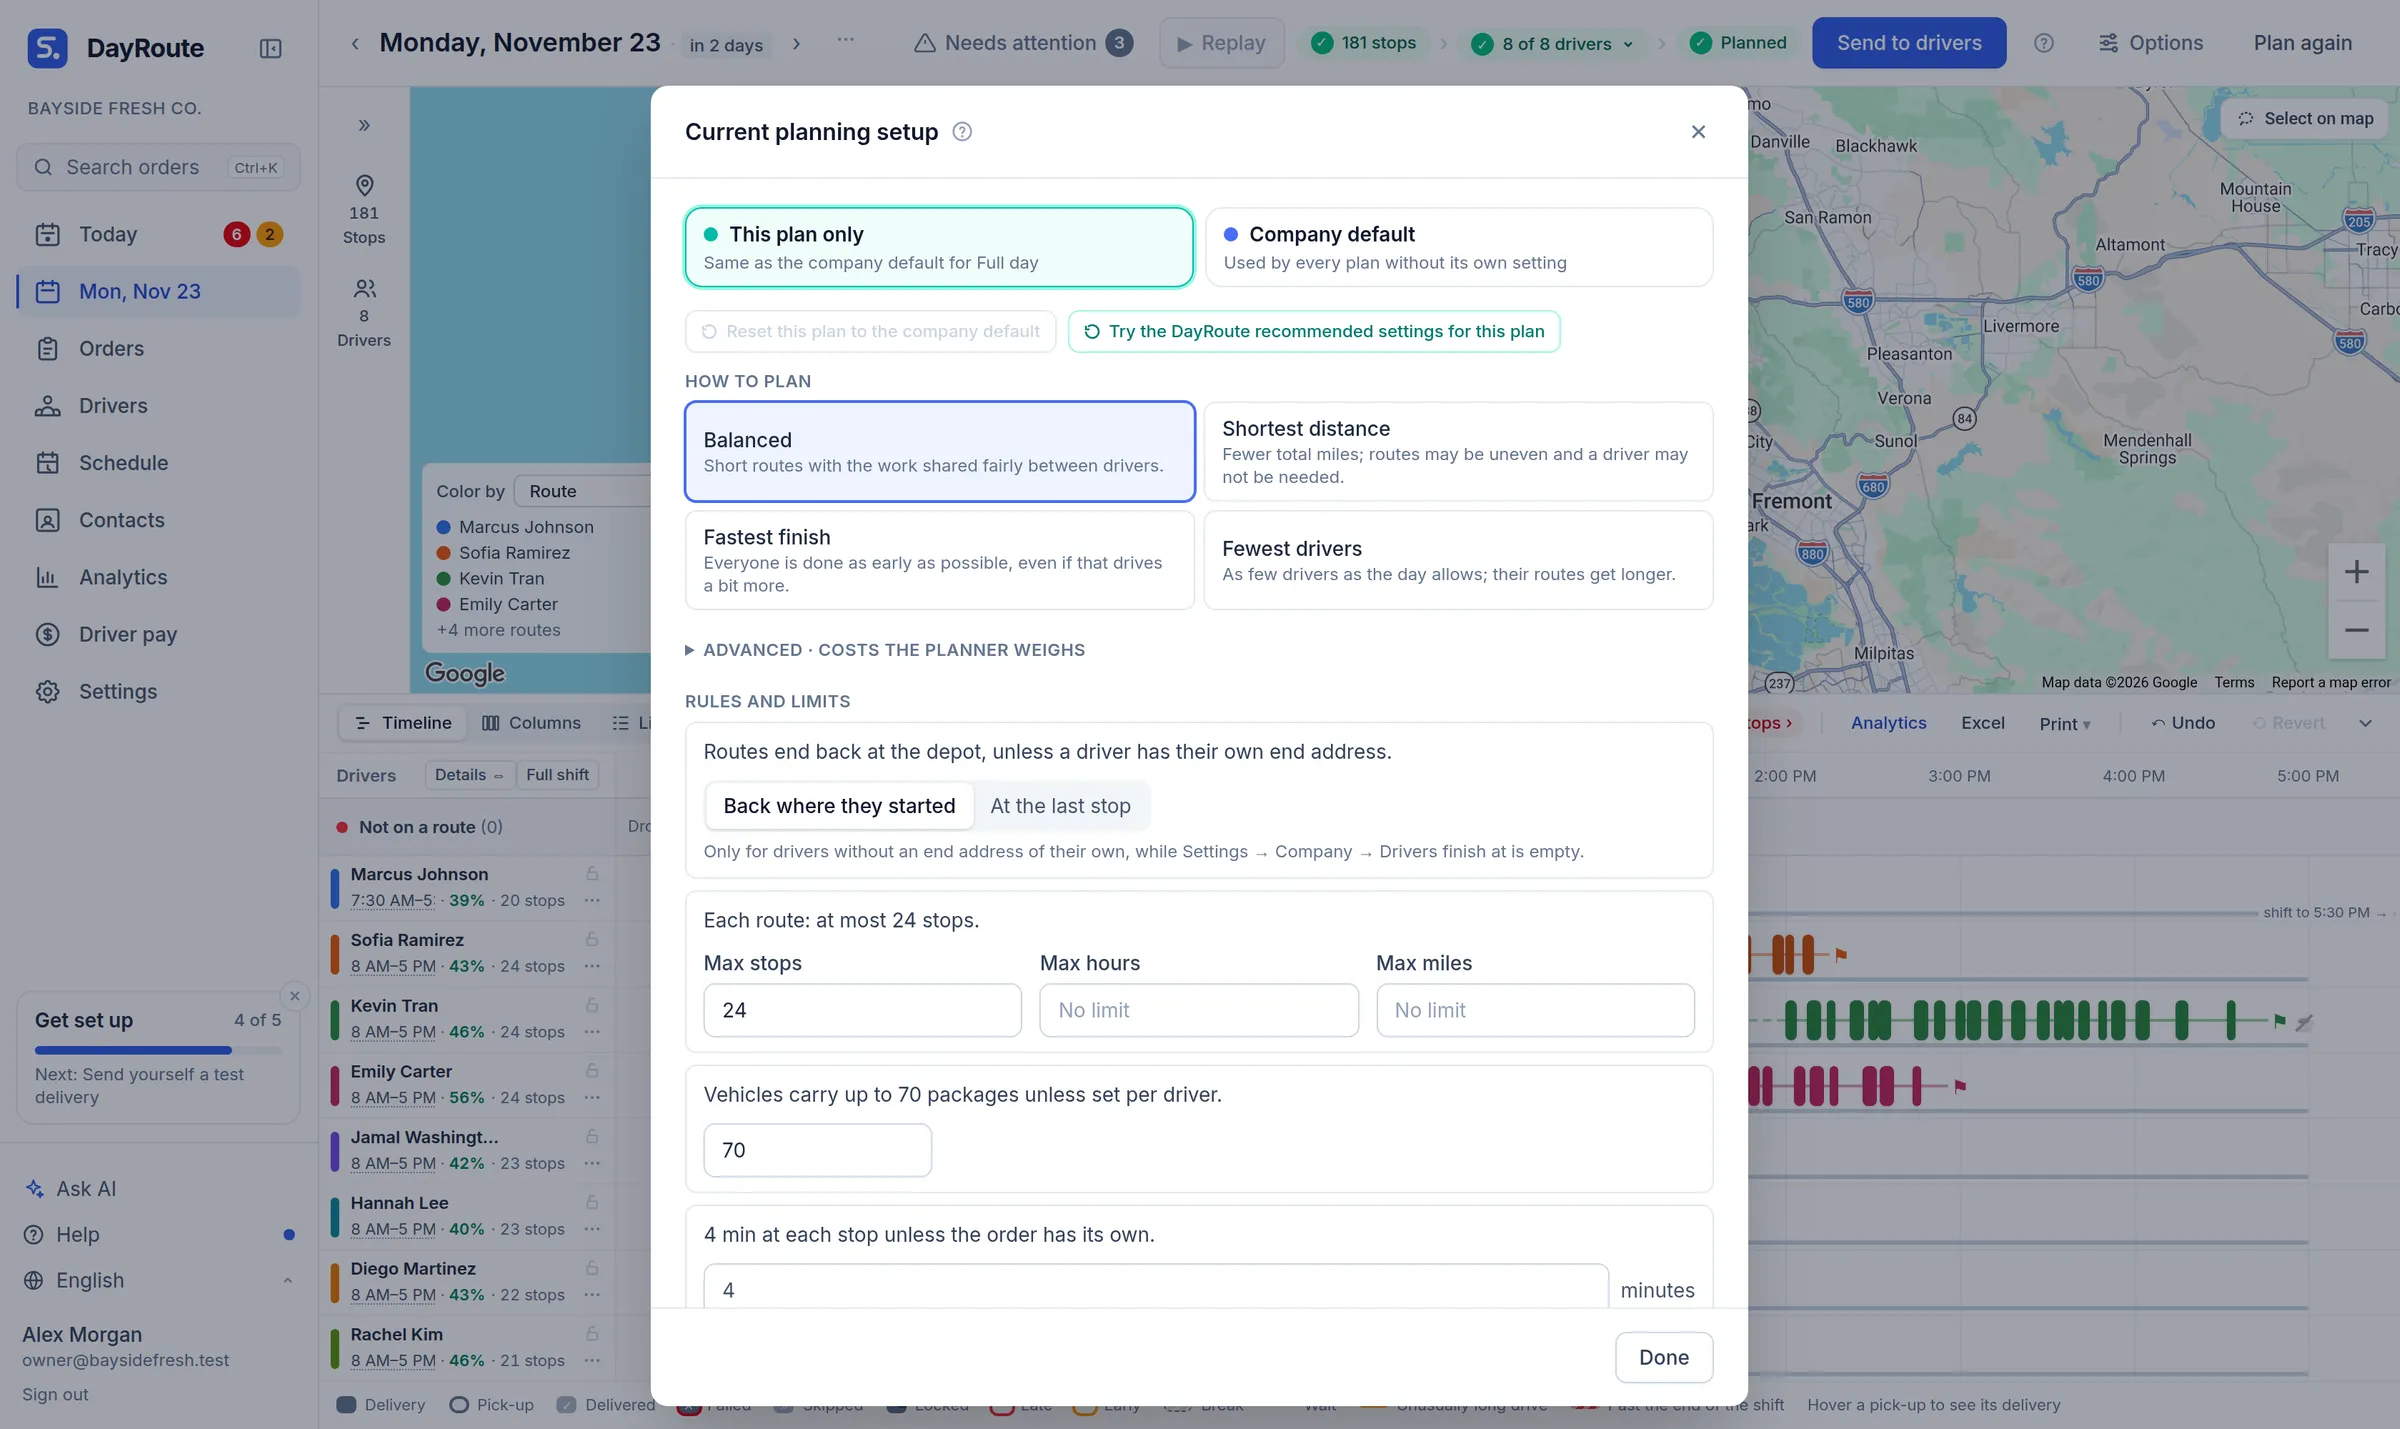
Click Options next to Plan routes. First pick how to plan, in plain words: Balanced, Shortest distance, Fastest finish or Fewest drivers; the costs and weights behind them stay folded under Advanced. Each other rule is a sentence with a control: when drivers start, fair sharing, late stops, overtime and limits per route. Save them for this plan only, or as the company default. Turn on “Prefer drivers who know the area” to give stops to drivers who delivered near them in the last 60 days. On a wide screen, a line next to Plan routes sums up the setup, such as “8 drivers · starting 7:30 AM · Balanced”.
Step 2: Give stops to a driver first
Some stops belong to one driver: a regular customer, a key only they have. Click Select on map, draw around those stops (or tick them in the list) and choose Assign to driver. Planning then gives them to that driver only and shares out the rest. Each stop shows its driver in the list, and its pin takes the driver’s color and initials. Choose No fixed driver to undo it.
Tip: If that driver isn’t working that day, planning leaves the stops out and says why instead of giving them to someone else.
Step 3: Plan the routes
Click Plan routes. The map shows each route in its driver’s color and the timeline shows the day from first stop to last, breaks included.
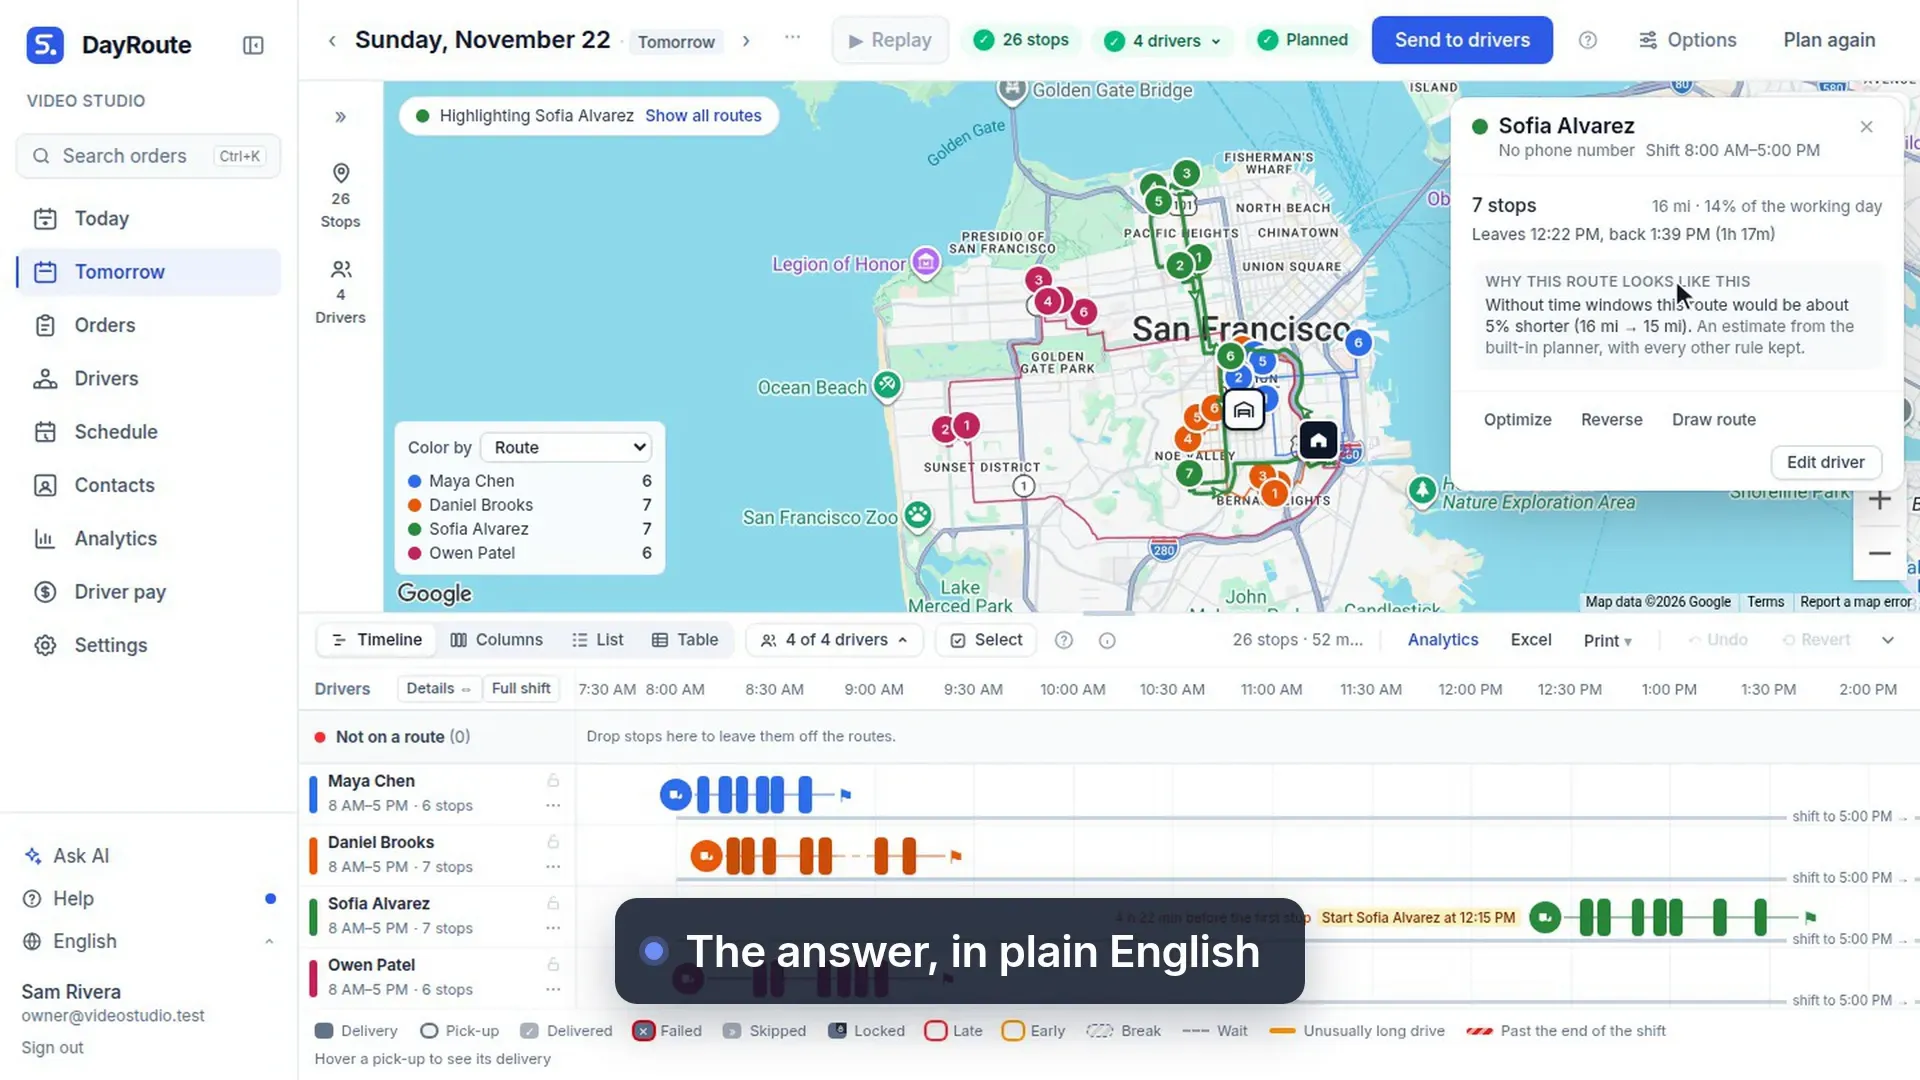
Why this route, and the map in colors · 36 s, no sound Open the video pageWhat this video shows
Why a route looks the way it does, in plain English, and the map colored by time window, on time or route.
- No black box.
- Why does a route look like this?
- Open the driver and read the answer in plain English: here, one order's time window brings the driver back to the same area.
- Color the map by time window,
- by on time,
- or by route.
Step 4: Read the stops by route
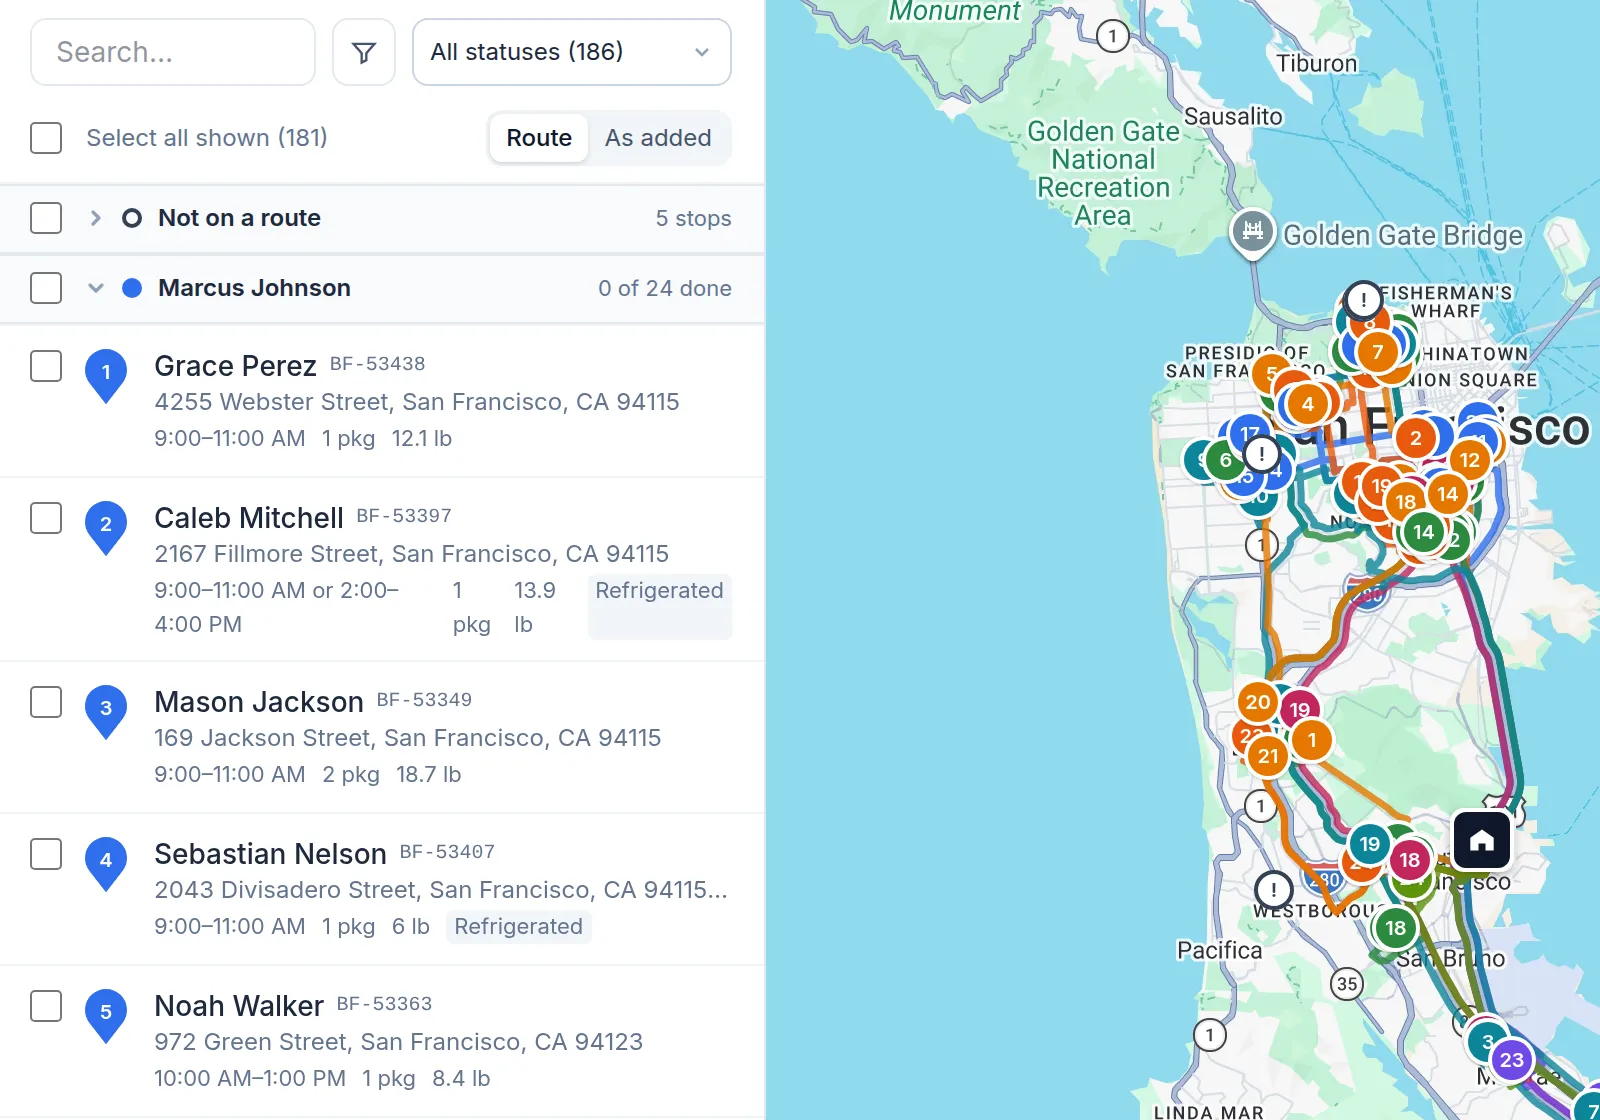
Once the day has routes, the Stops list groups them by route: stops not on a route first, then each route in driving order under its driver’s name and progress. Each stop has the same numbered pin as on the map. Click a route’s header to fold it, tick it to select the whole route, or switch Route to As added to see the stops in the order you added them.
Step 5: Check a stop at a glance
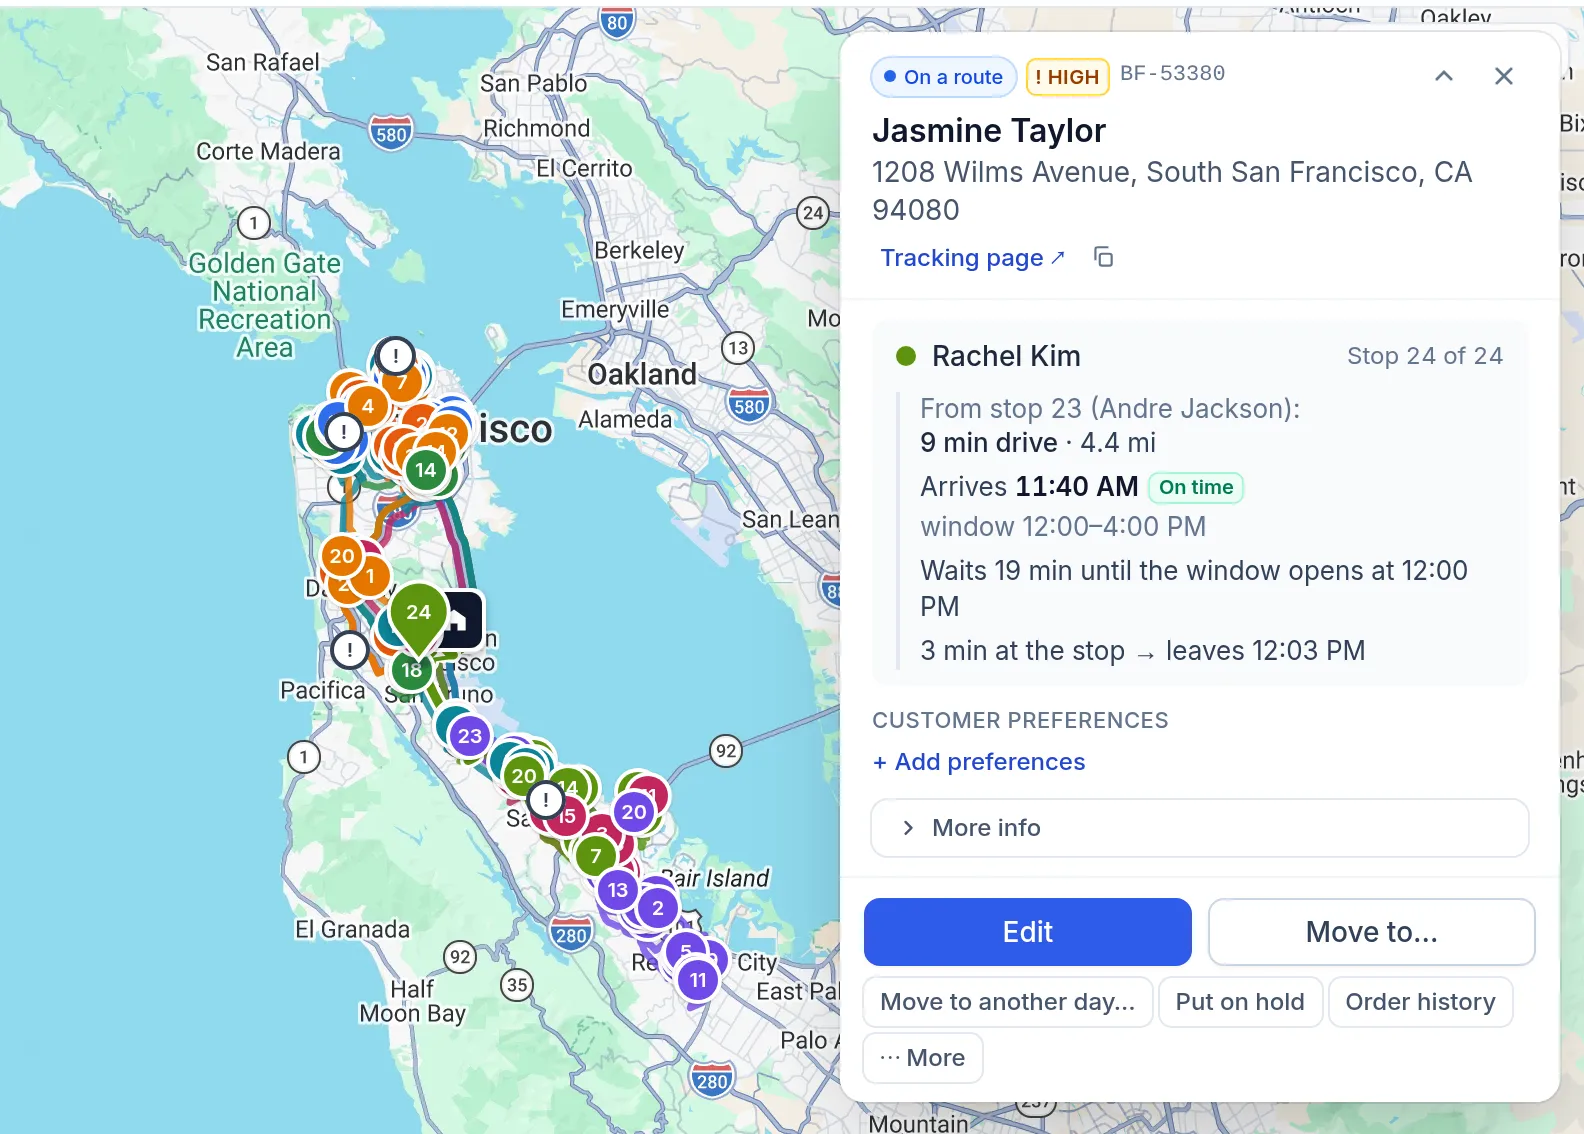
Click any stop on the map, in the list or on the timeline. A card opens over the map with its driver and stop number and the drive that gets there: how long, how far, any wait until the window opens and when the driver leaves. An amber “Unusually long drive” means the pin may be on a highway: click Move the pin. Below are the customer and load, and the usual actions: Edit, Move to… (a driver’s route, where it fits best, or always one driver), Move to another day, Put on hold and Cancel order. A Tracking page ↗ link at the top opens what the customer sees, next to a button that copies the link. When cancel messages are on, Cancel order says the customer will be told, with a box to untick. Press ↑ or ↓ to walk along the route, E to edit, Esc to close.
Step 6: Understand stops that didn’t fit
“Not on a route” lists every stop that couldn’t be planned and why: outside every shift, too heavy, no driver with the right skill. Adjust and plan again, or move them to another day; they keep their own priority unless you tick High priority there.
Step 7: Drag and drop
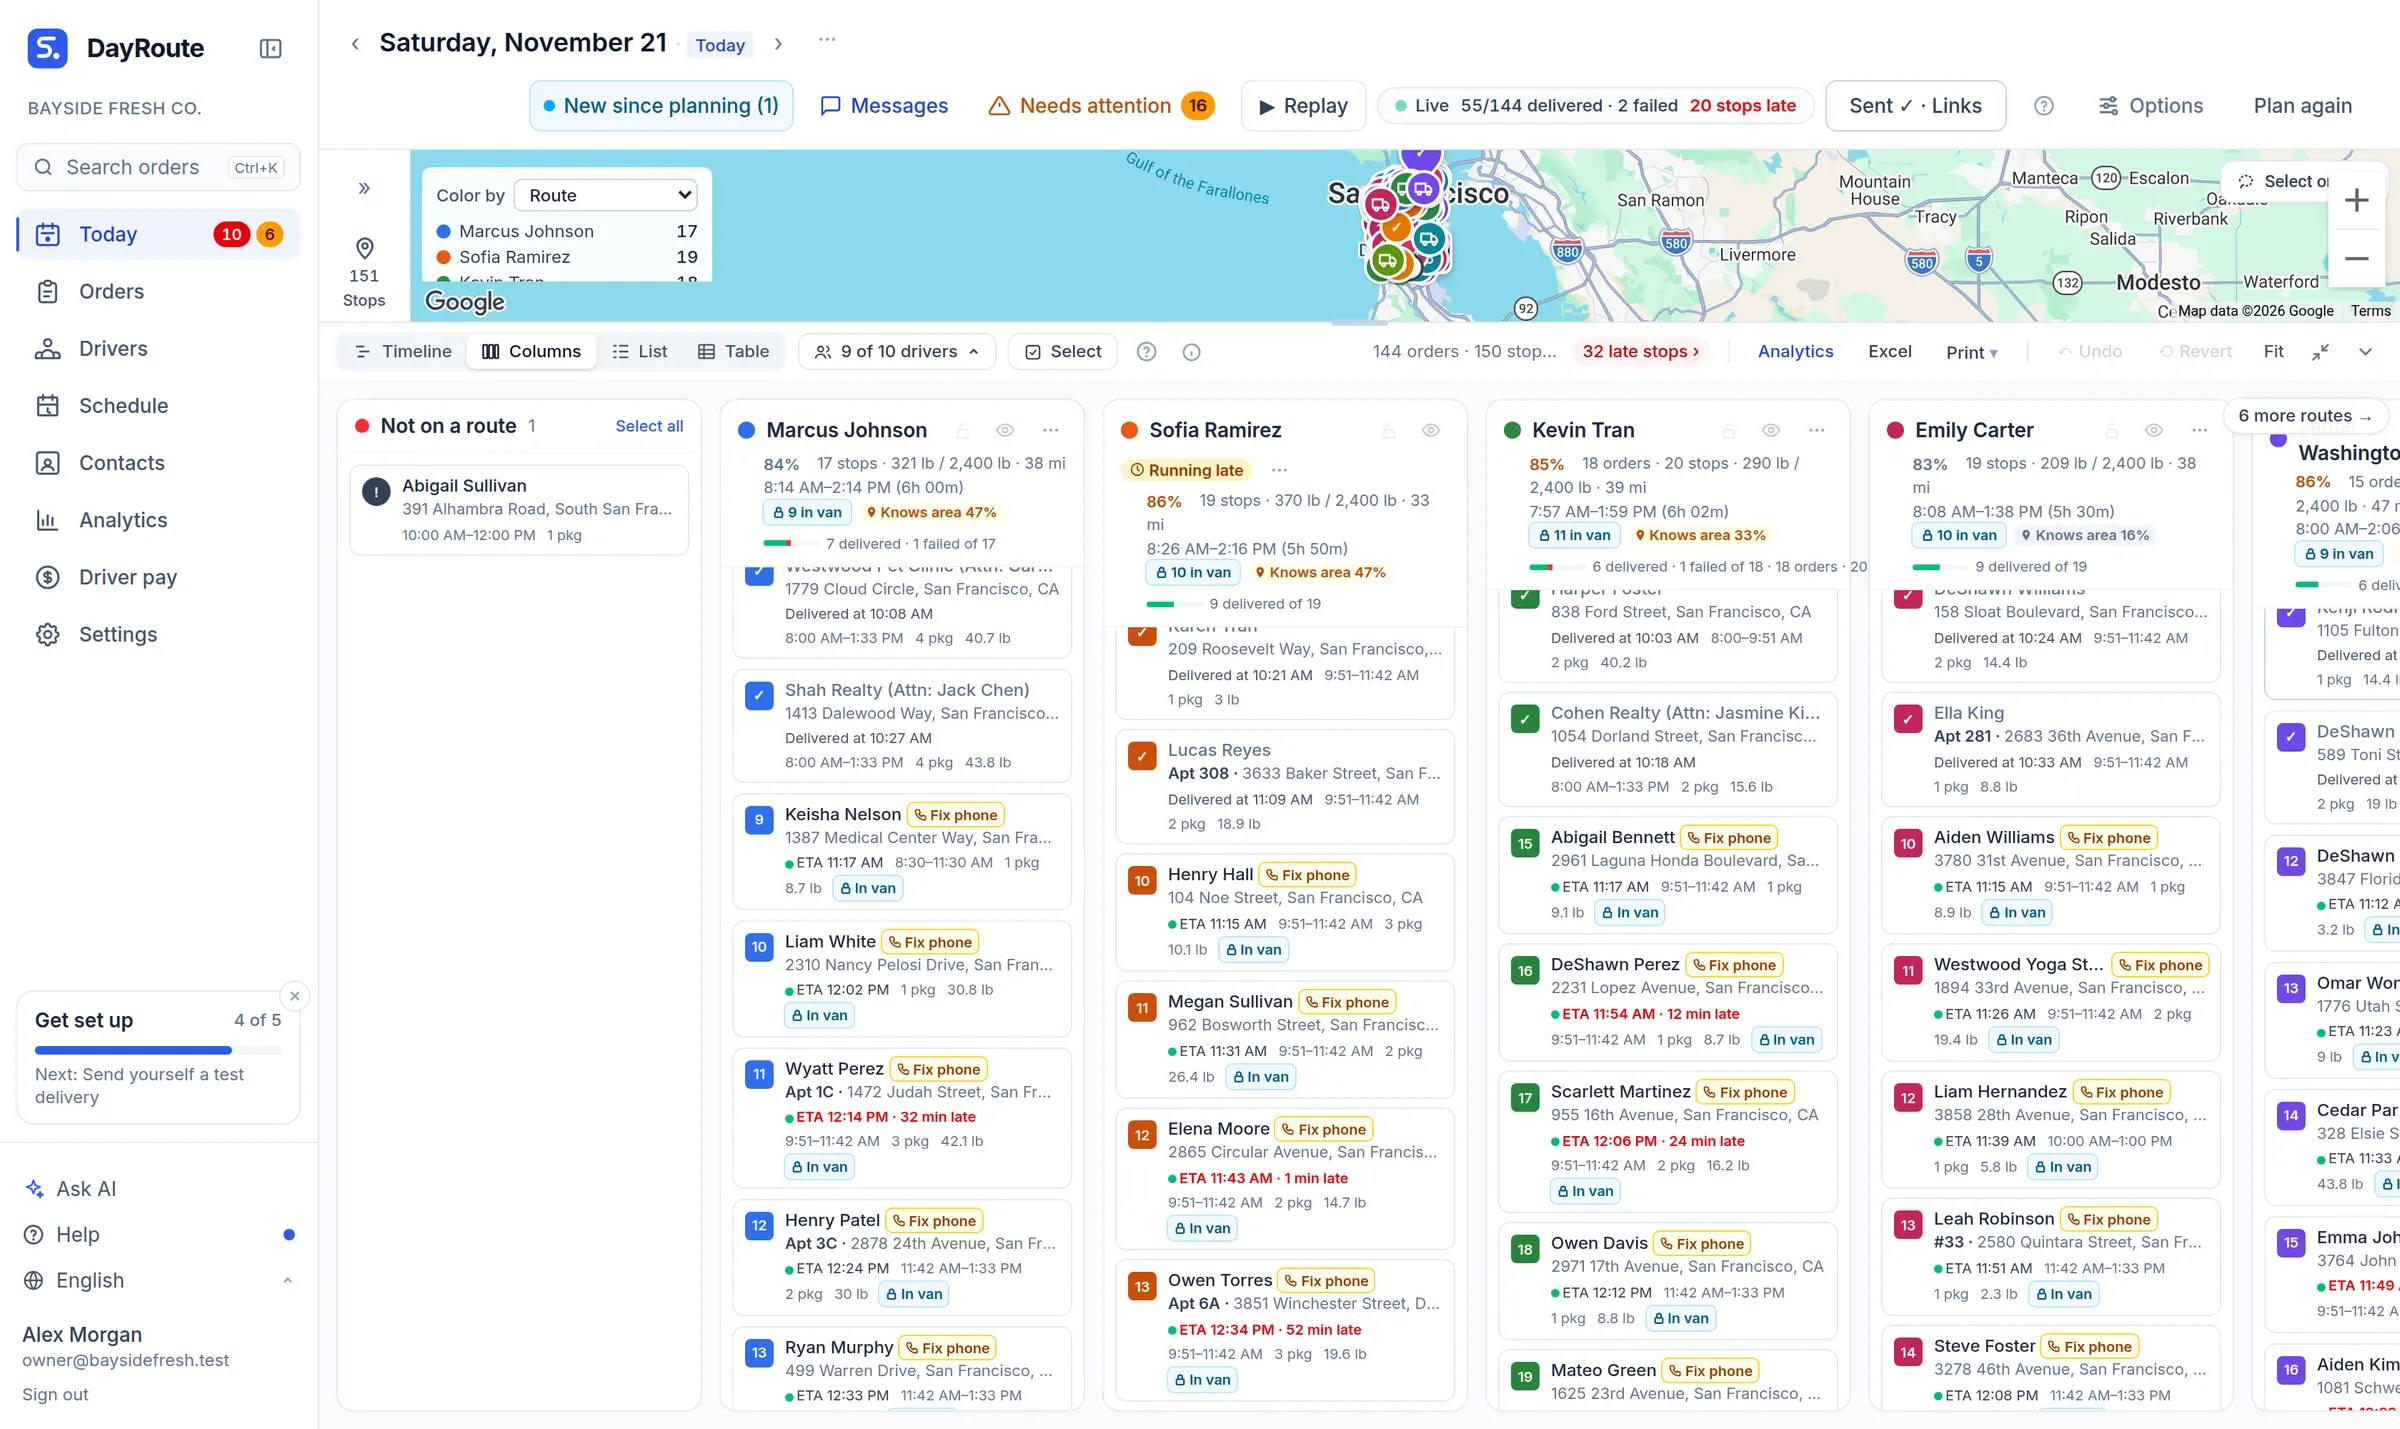
Drag a stop to another driver or another time on the timeline, or switch to Columns to reorder lists. Times update as soon as you drop and the stop stays where you put it; the route then shows a “Manual order” chip. If the drop makes stops late, DayRoute says so at once (“This makes 2 stops late”) with an Optimize this route button. Undo or Revert any time. Dragging never counts as a route planning. To move several stops at once, ⌘/Ctrl + click them, or Shift + click to pick every stop from the last one picked, then drag one of them: the others follow, in their order. On a tablet, tap Select on the board’s bar (or press and hold a stop) and tap the stops you want; Done or Esc ends it. To leave them off every route, drop them on “Not on a route” or click Take off routes; in the stop list, tick orders and click Take off routes. Stops a driver already started, on a locked route or already in a van stay where they are. Driver too far to drag to? Click Move to… on the board’s bar (or on a stop’s card), type part of their name and pick the route: the stops move as a drag would move them.
Step 8: Optimize one route
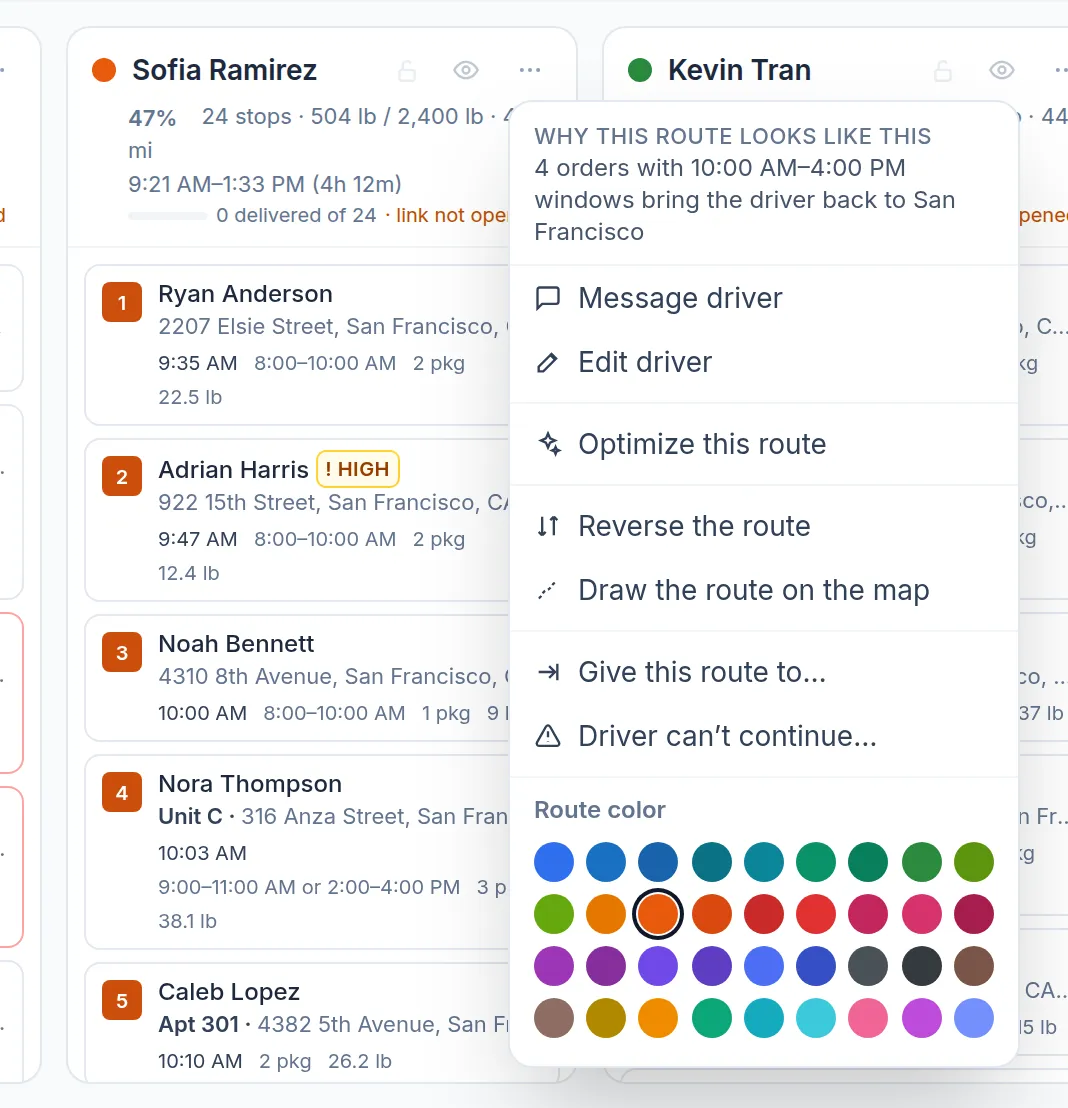
Open the route’s ⋯ menu and choose Optimize this route. The planner re-orders only that route: same driver, same stops, and stops already started stay first. A preview shows what it saves (time on the road, miles, fewer late stops) before anything changes. Choose Apply or Keep my order; Undo works as for any change.
Tip: It counts as one route planning. If your company plans on Google Route Optimization in its own Google Cloud project, Google bills your project for it like any Google planning, and it doesn’t count toward your monthly route plannings.
Step 9: Reverse a route or change its color
Open the route’s ⋯ menu and choose Reverse the route to drive it the other way round; Undo works as for any change. Pick a new color from the palette: it is the driver’s color everywhere, from the map to the run sheet.
Step 10: Draw the route you want
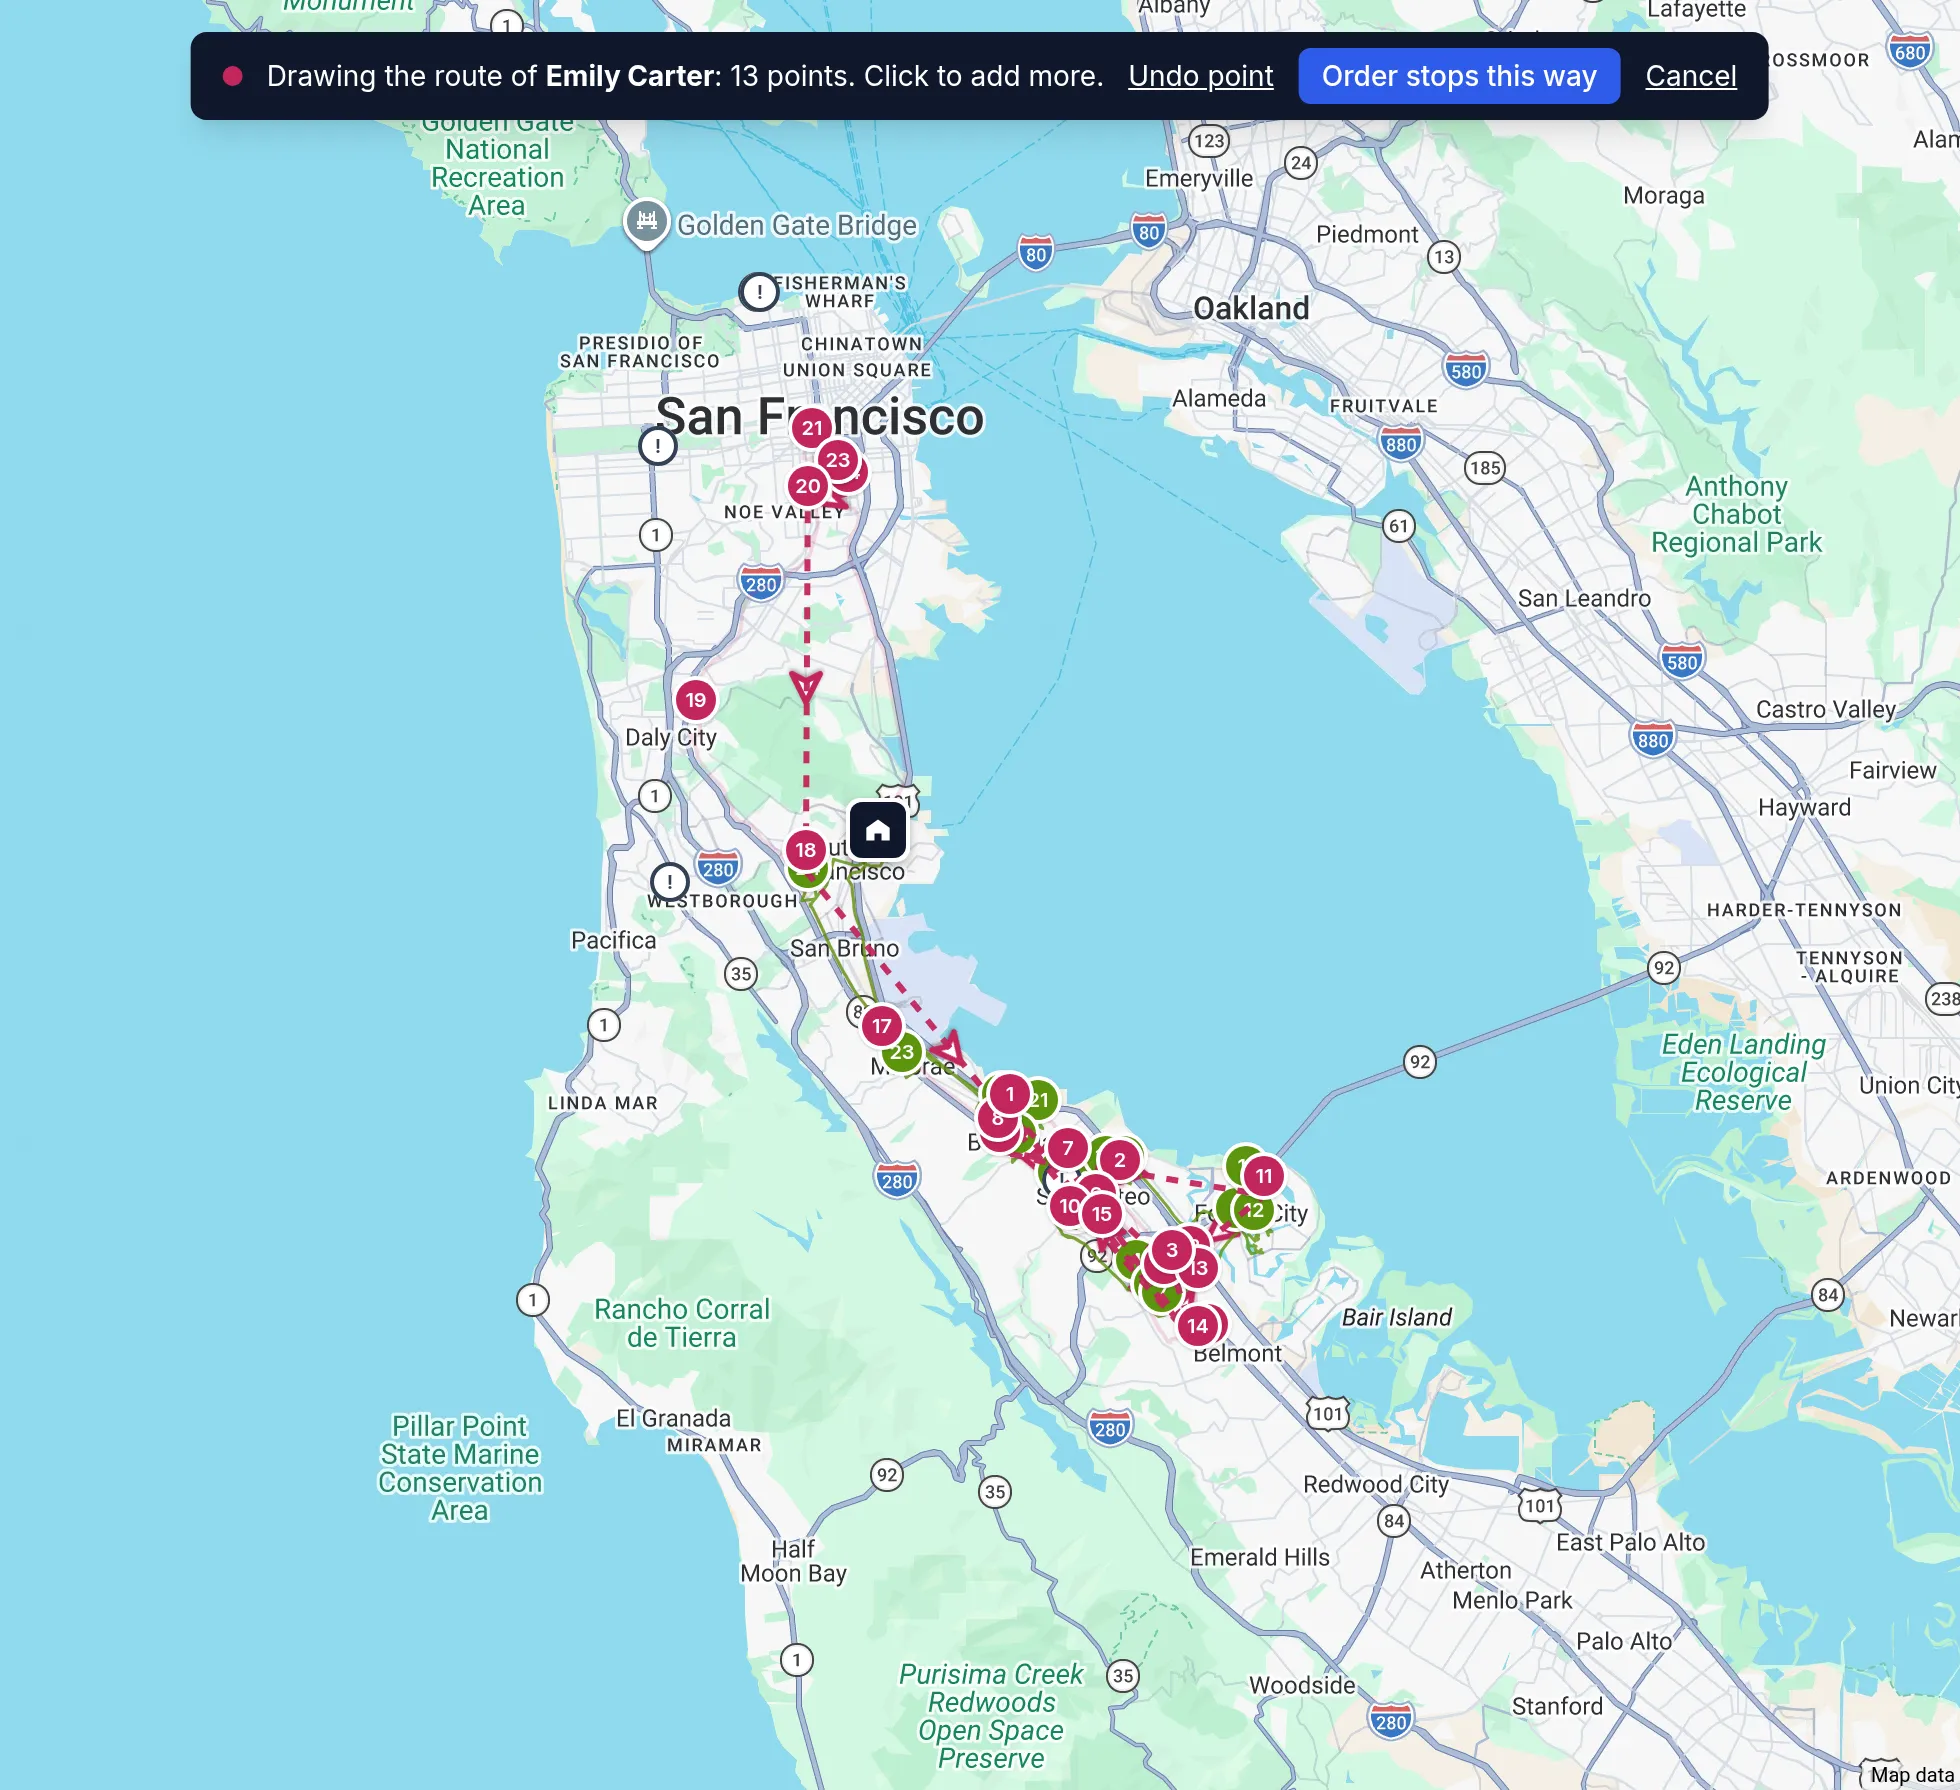
In the ⋯ menu, choose Draw the route on the map and click point after point (a click on a stop snaps to it; Backspace removes the last point). An arrow on each leg shows which way you are drawing. Choose Order stops this way (or press Enter): the stops go in the order your line passes them and the times are worked out again.
Tip: Stops already done or under way stay first, and Undo puts the old order back. On a route already sent, the driver gets the new order with Send updates.
Step 11: Lock and re-plan the rest
Lock the routes you are happy with and click Re-plan the others: only the unlocked routes change. When the day has new stops, Plan again asks first: Only add the N new stops, or Plan everything again. Once routes are sent, Only add the new stops is the default.
Step 12: See what a re-plan changed
After Plan again or a change of Options, a card says what moved: miles saved or added, more or less driver time, a driver not needed with these options, how many stops changed driver or were newly placed. Click Undo on it to go back to the routes you had.
Step 13: Add late orders
Select stops that are not on a route and choose Add to routes: insert them with the fewest changes, re-plan the affected routes, or give them all to one driver. Each driver shows how many of those stops they know (“knows 3/5”).
Questions this guide answers
- How do I add new orders after my drivers have already left?
- How do I plan delivery routes for multiple drivers?
- Why was a stop left off my routes? Reading unassigned-stop reasons
- How can I reduce delivery costs? A dispatcher’s checklist
- Route planner vs route optimization software: what is the difference?
Related feature
Optimized routes that respect how your day really works →